Circa 2012, there was a sort of code going around Tumblr. People wanted a way to start a conversation with someone in real life when they suspected the other person was a Tumblr user. The code was a way to start a conversation that wasn’t too weird or awkward. And it had a specific response to signal the other person was in on the code.
Someone decided it would be this:
You see someone out in public (bookstore, cafe, grocery store) who you think might also be a Tumblr user. You say, “Hey, I like your shoelaces.”
If they respond with, “Thanks, I stole them from the president,” that confirmed they were in on the code.
And then you could geek out about whatever fandoms and hobbies you had in common.
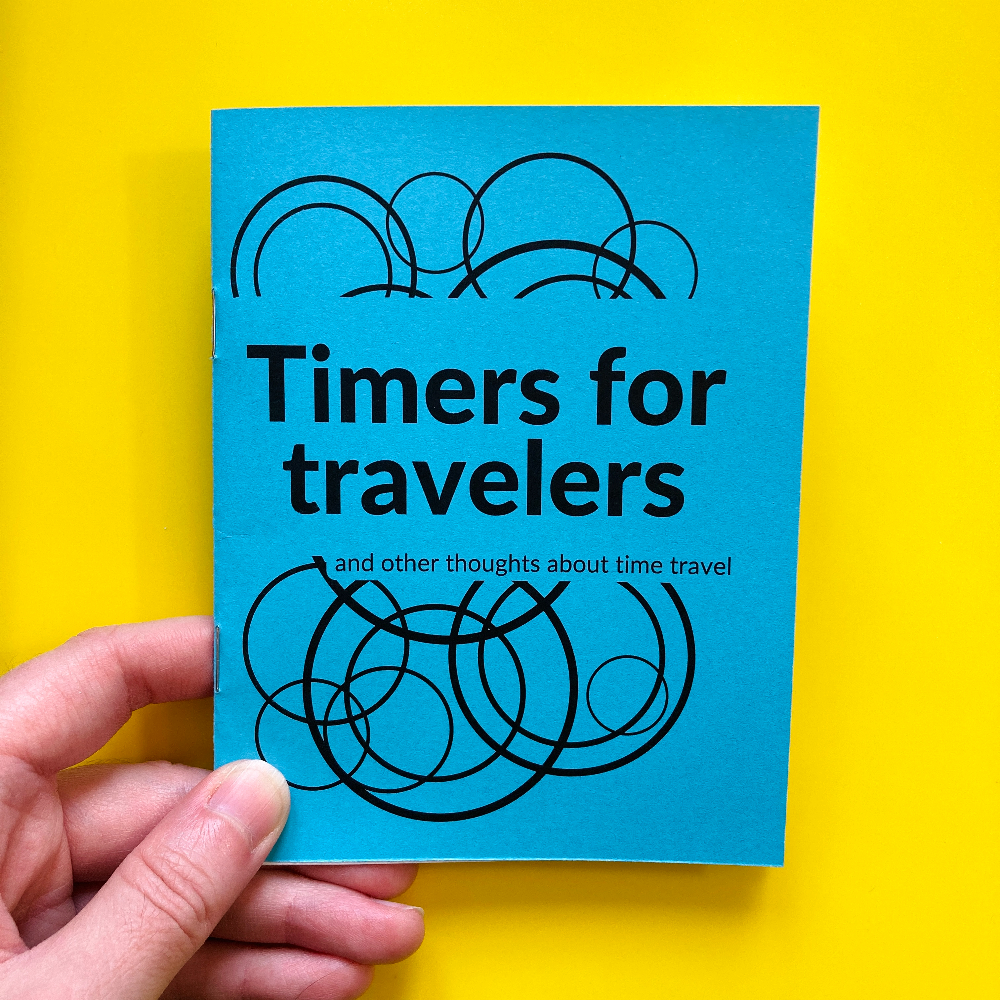
When I worked on my zine, “Timers for Travelers,” I finished the writing first. I knew I wanted illustrations throughout the zine, some hand-drawn and some digital. I decided to lay out the zine in Canva so that I could combine text, digital elements, and hand-drawn elements.
I’m really happy with how the zine came out, so I want to document my process. This is less a tutorial of Canva and more a walk-through of how I used it to put together my zine.
Canva is a free tool for graphic design. Although there are paid tiers, everything in this post was done with the free version. You can use Canva directly in an internet browser and there are apps you can download, too. If you haven’t used Canva before, you’ll need to create a free account.
Create a new file in Canva
Click on the Create a new design button and then click on Custom size. Enter the dimensions for your zine pages. For example, a quarter page zine would be 4.25 inches wide x 5.5 inches high. This file becomes your working file.
Make your zine
Make the pages of your zine with whatever method works for you. You can write text directly in Canva. I find it easier to do all my writing first in a word processor (I use Google Docs) and then copy and paste text into Canva.
Canva has a lot of graphic elements and images you can use for free. All the photos available in Canva are stock images from Pexels and Pixabay, and they are royalty-free.
Since you can upload images into Canva, you can draw on paper and scan pages. Then upload your drawings into Canva, and add them to your working file.
Note: Add page numbers last! If you're making pages and don't know what order they're going to be in yet, don't number pages. Instead, add page numbers after you have pages arranged in the order you want for the finished zine.
Print your zine
I like leaving my working file as is, like a draft. So when it’s time to print my zine, I make a copy of the working file (File >> Make a copy). This becomes the print file.
Since the pages will be printed on 8.5 x 11-inch paper, cut, folded, and stapled, they need to be arranged in the correct order for printing.
To figure out the print order of the pages, I make a mock-up version of the zine with scrap paper. There are lots of ways to do this. Here’s how I figure out page order.
Go to the print file in Canva and rearrange the pages for printing. You can drag and drop pages or use the up and down arrows above each page to change where they are.
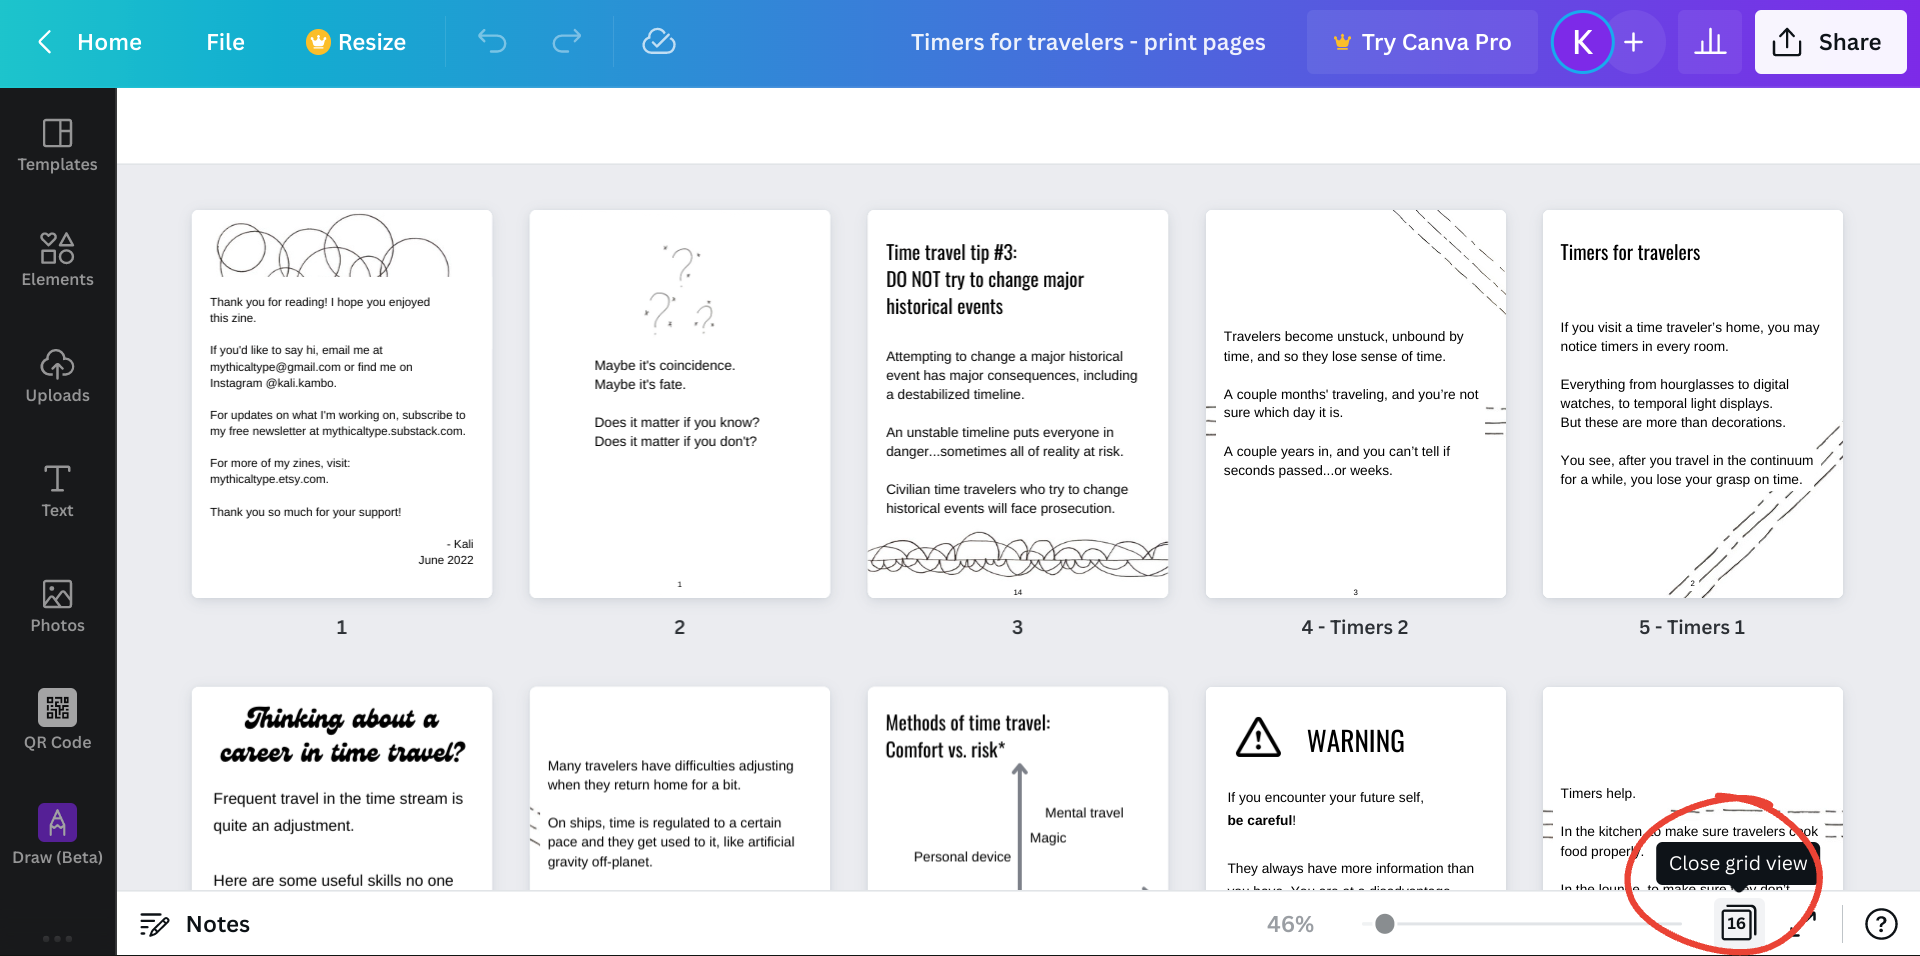
When I’m moving a lot of pages around, I like working in grid view. Click on the button in the bottom right of the screen that looks like a stack of papers with a number on it.
When you’re done arranging pages, download the print file as a PDF. Click on the Share button (top-right). Then click on Download. For “file type,” choose “PDF Print.”
Open the PDF file on your computer. Go to print settings. Find the option for pages per sheet, and change this to 4. This will print 4 of your zine pages on one 8.5 x 11 piece of paper. Make sure two-sided printing is selected.
Print your zine. Cut the pages in half horizontally and then fold them. If you ordered the pages correctly in Canva, then the pages should be in the correct order when you assemble them as a booklet.
How do you arrange zine pages so they print in the correct order? There are lots of ways to do this, depending on the size of your zine and the number of pages. Here’s one method for quarter-page zines.
Shout-out to Ryan at Pocket Thoughts. His method for printing quarter-page zines is the first one I learned. What I have below is similar to the way he does it.
Here’s how I determine page order for printing zines
This example is with a quarter-page zine where the cover is blue cardstock and the interior pages are standard white copy paper.
Printing a quarter-page zine on 8.5 x 11-inch paper means that you have 4 zine pages on the front of the sheet of paper and 4 zine pages on the reverse side of the sheet. So that you don’t have (unintentional) blank pages, your total number of zine pages should be a multiple of 4.
I make a paper dummy (aka mock-up) to figure out the page order. The process might be difficult to follow in writing, so I made a video explaining my method. The rest of this post is the method written out.
To make the mock-up, I use scrap paper that’s the same size as what the actual zine will be printed on (8.5 x 11 sheets of paper). If you’re going to have a different paper for the cover, you can use a different color of scrap paper or just mark the paper somehow so you know that’s the cover.
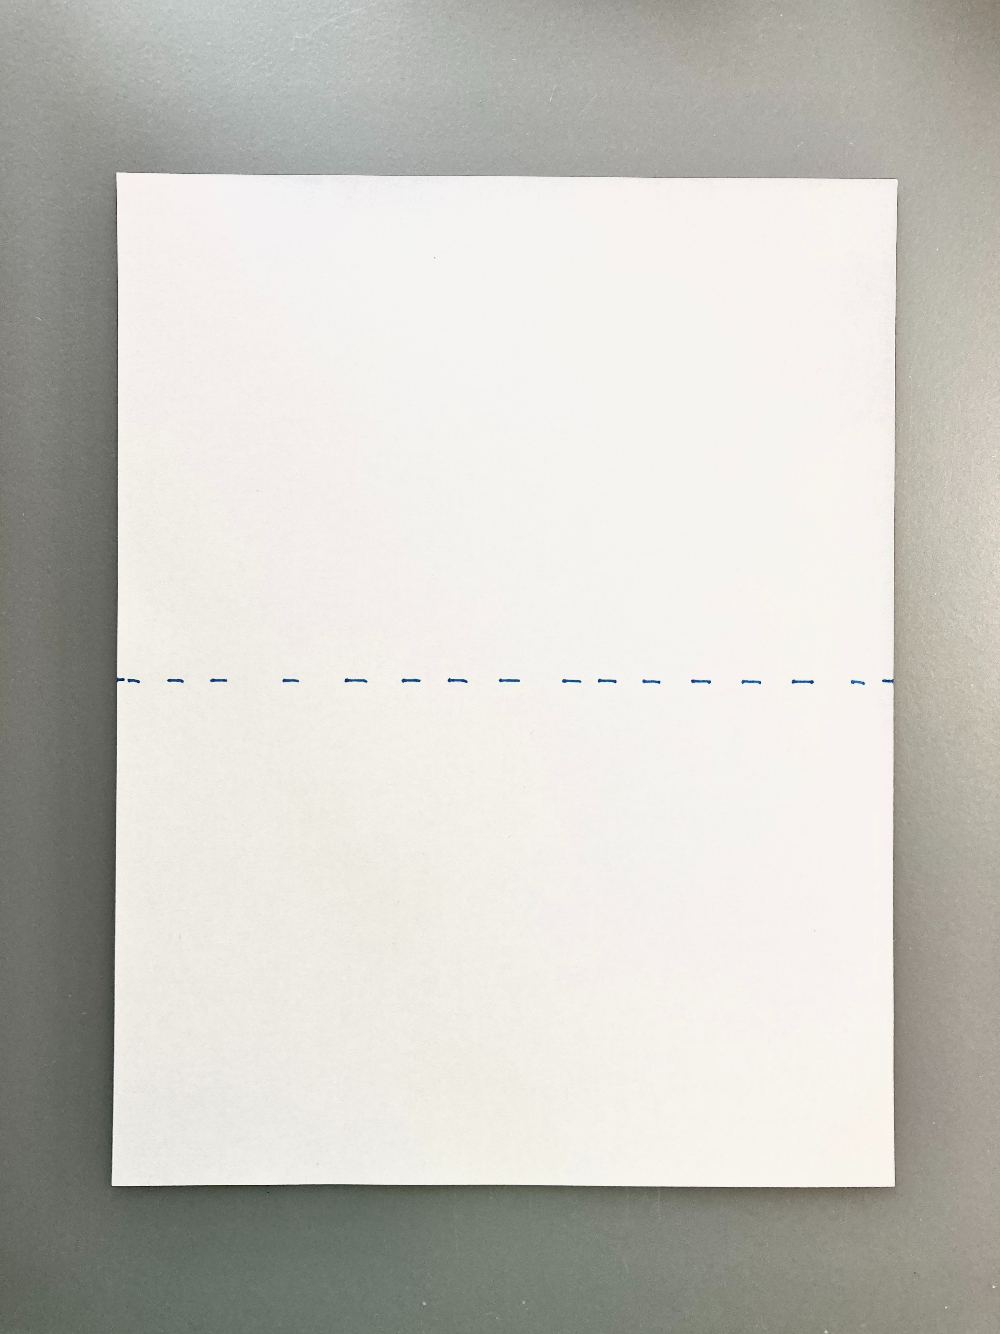
Cut the 8.5 x 11-inch pages in half horizontally.
Then fold the half-sheets vertically and put them together as a booklet. You should have the same number of pages as what you want your finished zine to be. Zines with 16 pages are common, so that would be the covers plus 12 interior pages.
Don’t staple the pages since you’ll be taking them apart anyway.
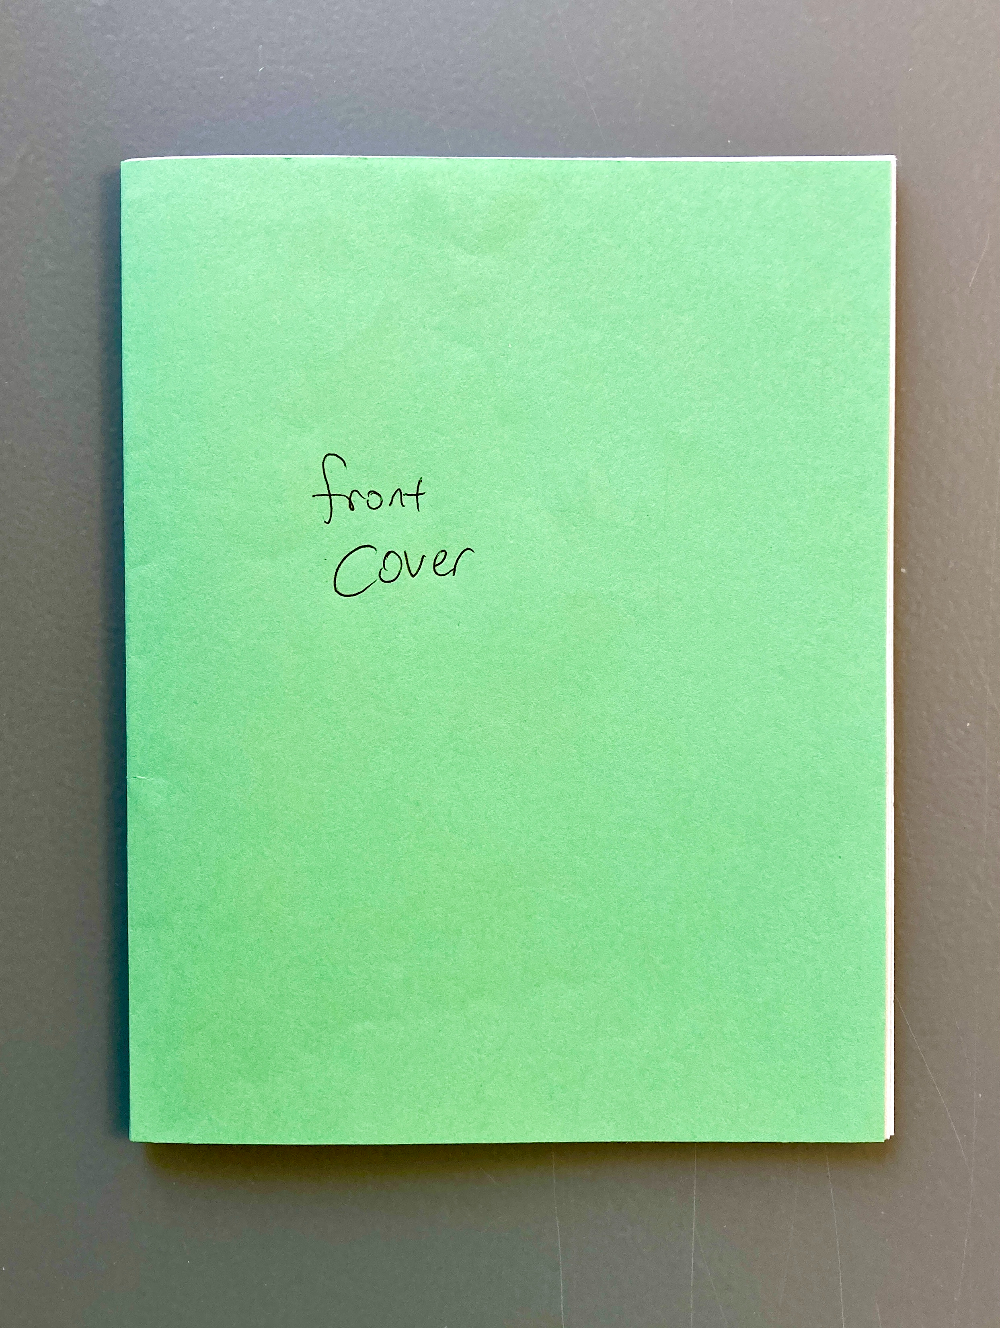
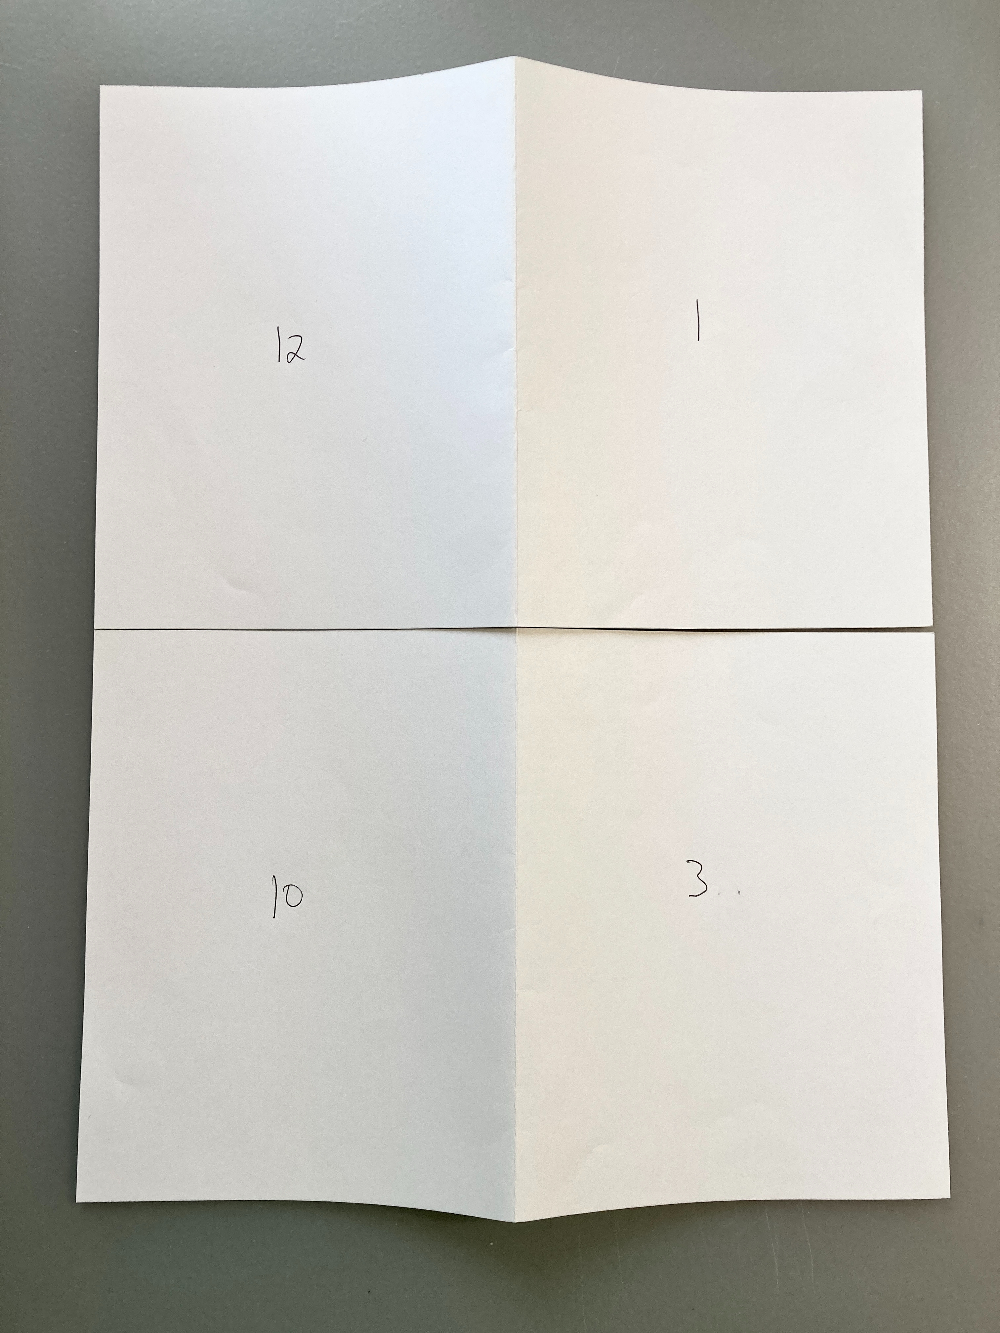
Label the front cover, back cover, and interior pages.
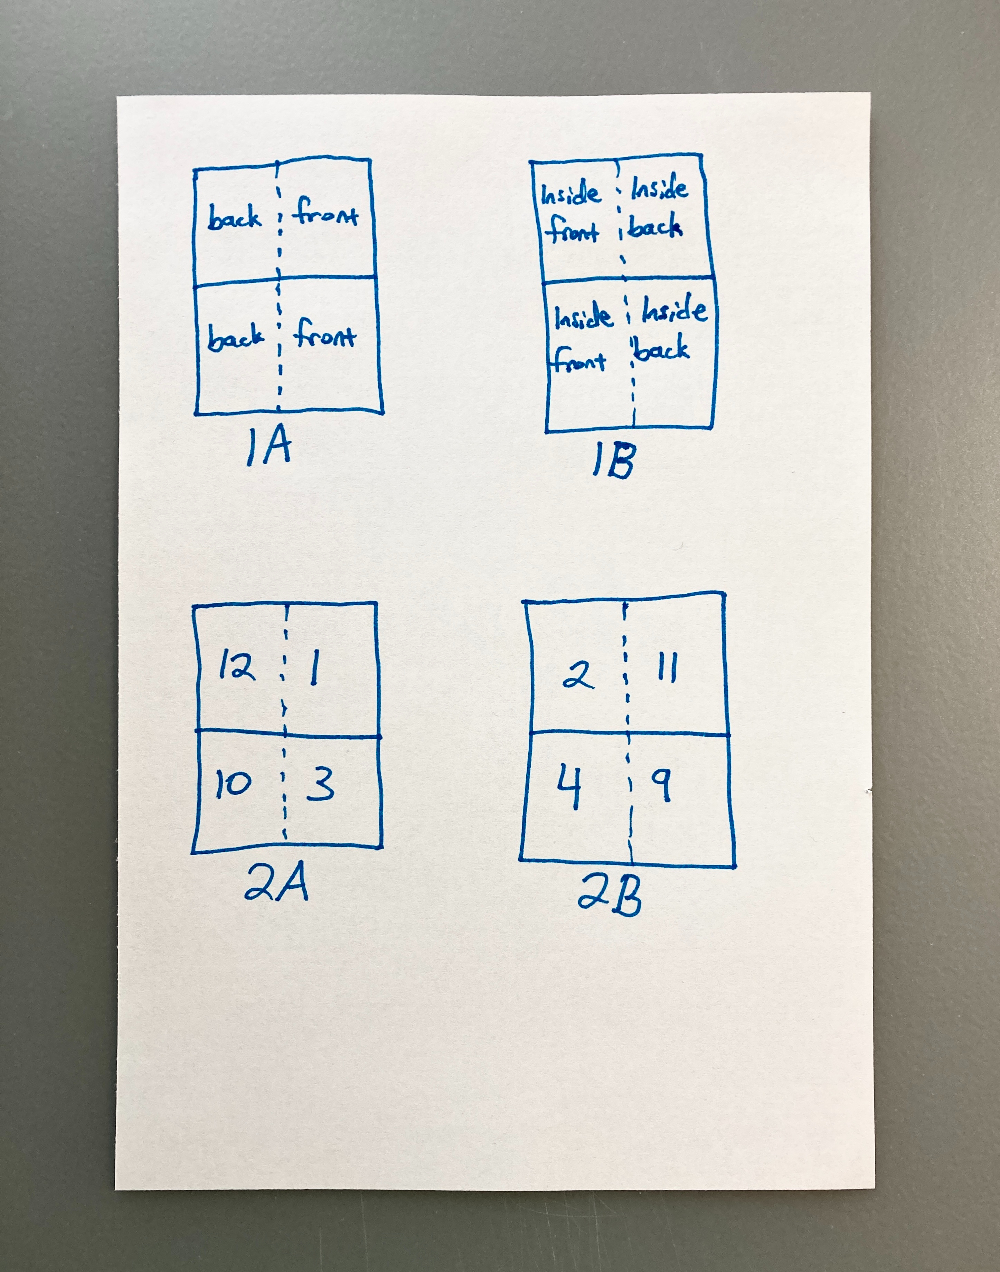
Take the pages apart, unfold them, and lay them out as if they were 8.5 x 11-inch sheets of paper. You’ll have groupings with 2 half-sheets. Then you can see how the zine pages should be ordered for printing. Flip the half-sheets over to see which zine pages would be on the reverse side of the page. This will show you how to arrange zine pages for double-sided printing.
Depending on the number of pages in your zine or if you want to use a different type of paper for the cover, you may end up with a half-sheet on its own. In this case, for the print layout you can copy and paste the top half of the sheet to the bottom half. So on the 8.5 x 11-inch sheet of paper, the top half would be the same zine pages as the bottom half.
Take notes so you remember the page order. These can be rough since they’re just for reference when you’re arranging pages in layout.
I use “1A” and “1B” to indicate that’s one sheet of paper, front side (1A) and back side (1B). Then “2A” is the front of the second sheet of paper and “2B” is the back of the second sheet of paper.
As long as you figured out the sequence correctly, you’ll be able to print and assemble your zines in the correct page order.
Let me know in the comments if you do something similar for figuring out the layout of your zines or if you use a completely different method.
I made a few new pages and other updates to this site, so here’s a rundown.
New pages
Zines – This is an overview page of my zines. I wanted a big picture view of my zines, which is something you don’t see by reading individual zine posts.
Tools – A list of digital and analog tools I use. I love seeing these kinds of lists from other people. I wanted to make my own for a while and now it’s done!
Follow – This page includes a form if you want email updates when new blog posts are up, links to where I post online (like social media and my newsletter), and a long list of my favorite people on the internet. If you like my work, you might enjoy theirs, too.
Blog post categories – This page lists all the blog post categories and the most recent posts in each one.
Blog post categories
I added two new categories. Process is for posts where I’m explaining how I did something. Things like setting up my bullet journal or making a zine. Updates is for any updates about my work or posts like this–updates about my site–how meta!
I updated the Blog menu to include only five categories. These are the ones I’ve been writing about recently. Like I said above, you can see all categories on the Blog post categories page.
A few more things
I updated the homepage so it’s cleaner and simpler.
I mentioned above that you can sign up for email updates on the Follow page. That will send you an email once a week with a summary of new blog posts. If I haven’t posted in the previous week, then there won’t be an email. Simple.
I’ve been enjoying working on my site. This sort of thing comes in phases for me, and I have fun trying new things in this space.
Tumblr + IndieWeb – Cool ideas here about interoperability between Tumblr as a social media platform and stuff published on the rest of the internet. And the Tumblr team is working on steps to make Tumblr more compatible with IndieWeb.
https://indiewebify.me/ — A guide for starting from scratch with your own domain. Some of the things discussed may also be done with WordPress plugins.